Title: How to Connect AirPods to Dell Laptop: A Comprehensive Guide
Introduction:
In today’s digital age, wireless headphones like Apple’s AirPods have become ubiquitous companions for many individuals, offering convenience and high-quality audio. If you own a Dell laptop and want to enjoy the freedom of wireless audio, you’ll be pleased to know that connecting AirPods to your device is a straightforward process. In this guide, we’ll walk you through the steps to seamlessly pair your AirPods with your Dell laptop, ensuring a hassle-free experience.
1. Check Compatibility:
Before attempting to connect your AirPods to your Dell laptop, it’s essential to ensure compatibility between the two devices. While AirPods are designed primarily for use with Apple products, they can still be paired with Windows-based devices like Dell laptops that support Bluetooth connectivity.
Also Read: How To Connect Airpods To Hp Laptop Windows 10
2. Enable Bluetooth on Your Dell Laptop:
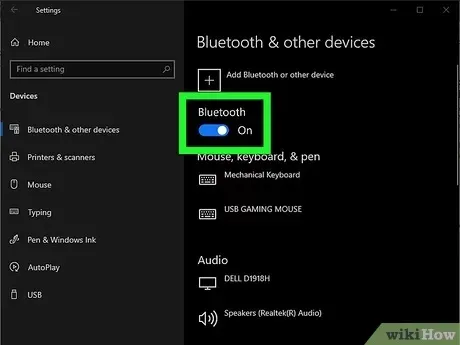
The first step in connecting your AirPods to your Dell laptop is to ensure that Bluetooth is enabled on your device. Follow these simple steps to activate Bluetooth:
- Navigate to the “Settings” menu on your Dell laptop.
- Select “Devices” or “Bluetooth & other devices.”
- Toggle the Bluetooth switch to the “On” position.
3. Put Your AirPods in Pairing Mode:
To initiate the pairing process, you’ll need to put your AirPods into pairing mode. Follow these steps:
Related Post: How To Connect Airpods To A Lenovo Laptop
- Open the lid of your AirPods case.
- Press and hold the setup button on the back of the case until the status light flashes white.
4. Pair AirPods with Dell Laptop:
Once your AirPods are in pairing
Further Reading: How To Connect Airpod To Hp Laptop
Check Out: How To Connect Airpod Pro To Windows Laptop