How to Take a Screenshot on Your Laptop: A Comprehensive Guide
In today’s digital age, taking screenshots is a fundamental skill for anyone using a laptop. Whether you need to capture a funny meme, document an important error message, or save a portion of your screen for reference, knowing how to take a screenshot is essential. This guide will walk you through the process step by step, ensuring that users of all levels can easily master this basic yet crucial function.

Understanding the Basics
1. Know Your Operating System
Before diving into the specifics, identify the operating system (OS) your laptop is running. The methods for taking screenshots can vary between Windows, macOS, and Linux. Understanding your OS is the first step towards capturing the perfect screenshot.
2. Common Screenshot Shortcuts
Most laptops share common keyboard shortcuts for taking screenshots:

- Windows:
PrtScnorSnipping Tool - macOS:
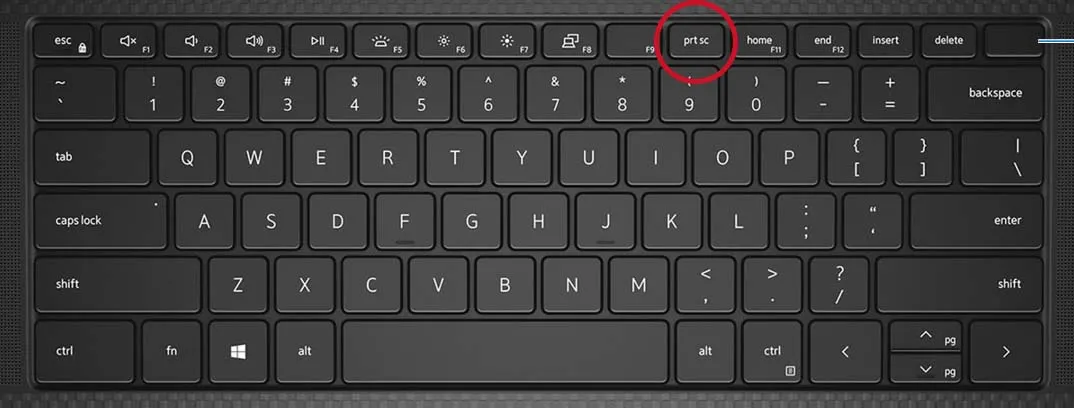
Command (⌘) + Shift + 3orCommand (⌘) + Shift + 4 - Linux:
PrtScorShift + PrtScfor specific areas
Screenshot Techniques for Different OS
3. Windows Screenshot Methods
3.1. PrtScn (Print Screen)
- Press the
PrtScnkey to capture the entire screen. - Open Paint or any image editor, press
Ctrl + Vto paste, and then save.
3.2. Snipping Tool
- Search for ‘Snipping Tool’ in the Start menu.
- Open the tool, select ‘New,’ and choose the area to capture.
- Save the snip accordingly.
4. macOS Screenshot Methods
4.1. Command (⌘) + Shift + 3
- Captures the entire screen.
- Find the screenshot on your desktop.
4.2. Command (⌘) + Shift + 4
- Select a specific area to capture.
- Locate the screenshot on the desktop.
5. Linux Screenshot Methods
5.1. PrtSc
- Captures the entire screen.
- Find the screenshot in your Pictures folder.
5.2. Shift + PrtSc
- Allows you to select a specific area.
- The screenshot is saved in the Pictures folder.
Advanced Screenshot Techniques
6. Using Snipping Tool on Windows
6.1. Delay Feature
- The Snipping Tool allows you to delay the capture for a few seconds.
- Useful when you need to capture pop-up menus or tooltips.
7. Annotation and Editing
- Utilize built-in editing tools or external software to annotate and edit your screenshots.
- Add text, highlight sections, or crop as needed.
Frequently Asked Questions (FAQs)
8. FAQ Section
8.1. Can I Change the Default Screenshot Folder?
Yes, you can. In Windows, Snipping Tool allows you to set a custom save location. On macOS, use Terminal to change the default location.
8.2. What if My Print Screen Key Doesn’t Work?
For Windows, try using Windows key + Shift + S for Snip & Sketch. On macOS, check your keyboard settings or use third-party apps for remapping keys.
8.3. Are There Screenshot Apps for Advanced Features?
Yes, several third-party apps provide additional features, such as extended editing tools, cloud storage integration, and more.
Conclusion
Mastering the art of taking screenshots on your laptop is a valuable skill that enhances your ability to capture and share information. Whether you’re a student, professional, or casual user, understanding the diverse methods for different operating systems empowers you to efficiently capture and communicate your digital experiences. Practice these techniques, explore advanced options, and elevate your screenshot game.
Related Post: How To Screenshot On A N Hp Laptop
Also Read: How To Screenshot On A Dell Laptop

