
How to Record a Zoom Meeting on Your Laptop: A Comprehensive Guide
In the era of virtual meetings and remote collaboration, Zoom has become a cornerstone tool for connecting with colleagues, clients, and friends. If you find yourself wondering how to record a Zoom meeting on your laptop, you’re in the right place. This step-by-step guide will walk you through the process, catering to both beginners and those looking to enhance their recording skills.
Understanding the Basics
Before diving into the recording process, let’s ensure you have a solid grasp of the fundamentals:
Further Reading: What Size Laptop For College
1. Check Your Zoom Plan
Ensure your Zoom plan supports recording capabilities. Not all plans offer this feature, so it’s crucial to be on a plan that allows recording.
2. Update Zoom to the Latest Version
Always use the latest version of Zoom to access the newest features and ensure a smooth recording experience. Regularly updating your Zoom app guarantees compatibility with your laptop’s operating system.
Check Out: How To Connect A Laptop To A Pc
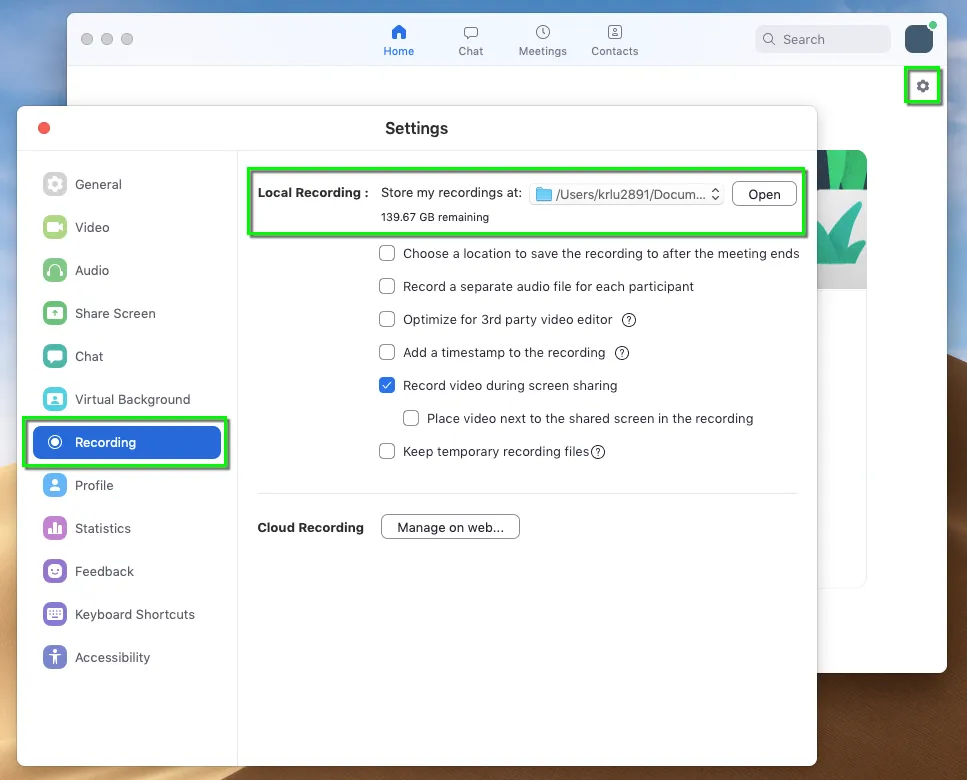
3. Choose Recording Settings
Decide whether you want to record the meeting on your computer or in the cloud. Local recordings are stored on your device, while cloud recordings are saved on the Zoom server.
Check Out: How To Turn On Subtitles On Apple Tv On Laptop
Step-by-Step Guide to Recording a Zoom Meeting on Your Laptop
Now, let’s delve into the process of recording a Zoom meeting on your laptop. Follow these steps for a seamless experience:
1. Start or Join a Zoom Meeting
- Open the Zoom application on your laptop.
- Join an existing meeting or start a new one.
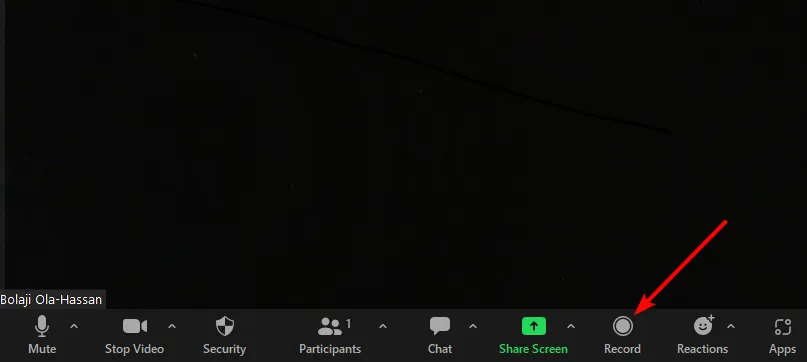
2. Host Controls for Recording
- As the host, locate the toolbar at the bottom of the screen during the meeting.
- Click on the “More” button (three dots), and select “Record.”
3. Participants’ Perspective
- If you’re a participant, request recording permission from the host.
- Once granted, you can click on the “More” button and choose “Record.”
4. Record on the Cloud (Optional)
- If you prefer cloud recording, select “Record to the Cloud” when initiating the recording.
5. End the Meeting and Stop Recording
- When the meeting concludes, click on “End Meeting” to stop the recording.
- Zoom will automatically save the recording to your chosen location.
Troubleshooting Tips
Encountering issues during the recording process? Consider these troubleshooting tips:
1. Check Available Storage
- Ensure you have enough storage space on your laptop to accommodate the recording.
2. Review Permissions
- Confirm that you have the necessary permissions to record, especially if you’re not the meeting host.
3. Update Drivers
- Update your laptop’s audio and video drivers to prevent potential glitches during recording.
Frequently Asked Questions (FAQs)
Q1: Can I edit my Zoom recording?
A1: Yes, Zoom allows you to trim the beginning and end of your recording. Follow Zoom’s editing guide for detailed instructions.
Q2: Where are Zoom recordings saved on my laptop?
A2: By default, local recordings are saved in the Zoom folder within the Documents directory.
Q3: Can I record a Zoom meeting without permission?
A3: No, only the meeting host or someone granted recording permission can initiate the recording.
Q4: How do I share my recorded Zoom meeting?
A4: You can share the recording directly through Zoom, or you may locate the recorded file on your laptop and share it manually.
By following this guide, you’re now equipped with the knowledge to effortlessly record Zoom meetings on your laptop. Whether you’re a seasoned professional or a beginner navigating the virtual landscape, these steps ensure you capture every important moment with ease. Happy recording!
Further Reading: How To Replace Laptop Hard Disk
Check Out: What Size Laptop Fits In Kanken