Title: A Comprehensive Guide on How to Print Screen from Your Laptop
Introduction: Unlocking the Power of Screenshots
In the digital age, capturing what’s on your laptop screen is a fundamental skill. Whether you want to save a memorable moment, share an error message with tech support, or create a tutorial, knowing how to print screen is essential. In this guide, we’ll walk you through the process step by step, providing both technical details and user-friendly insights.
Further Reading: How To Tell What Laptop I Have
Section 1: Understanding the Basics of Screenshots
What is a Screenshot?
Check Out: How To Pair My Samsung Earbuds To My Laptop
Before diving into the “how,” let’s clarify the “what.” A screenshot is essentially a snapshot of your computer screen. It allows you to capture and save the current display as an image file.
Why Take Screenshots?
Also Read: How Do You Measure The Screen Size Of A Laptop
Screenshots serve various purposes, from documenting software bugs to sharing amusing social media posts. Knowing when and why to take a screenshot is the first step towards mastering this skill.
Section 2: Different Methods for Different Systems
Windows Operating System
-
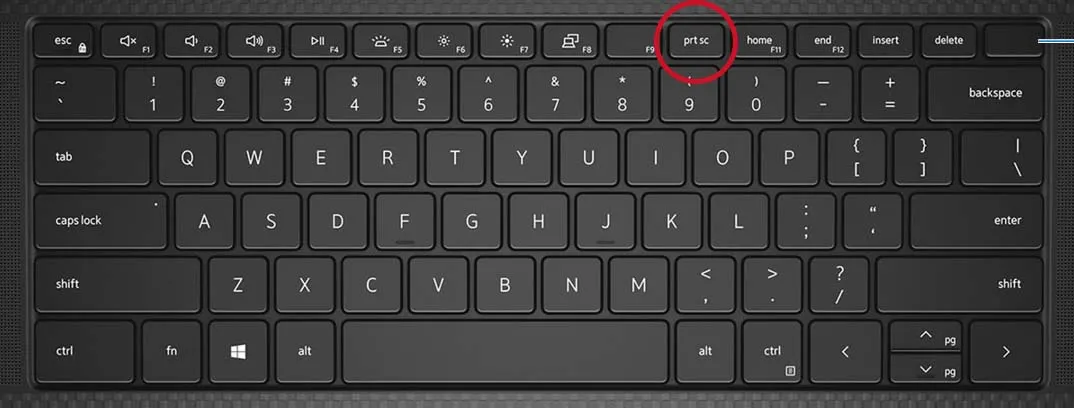
Print Screen Key (PrtSc): The classic method involves pressing the “PrtSc” key to capture the entire screen. For a specific window, use “Alt + PrtSc.” Paste the screenshot into an image editor to save or edit.
-
Snipping Tool and Snip & Sketch: Windows offers built-in tools for capturing specific areas or creating free-form snips. These tools provide more flexibility and are perfect for precise screenshots.
MacOS
-
Command + Shift + 3: Capture the entire screen using this keyboard shortcut. The screenshot is saved to your desktop.
-
Command + Shift + 4: For a selected area, use this shortcut. Drag and drop to capture the desired portion.
Section 3: Utilizing Third-Party Software
While operating systems provide native solutions, third-party applications can enhance your screenshot capabilities.
Snagit and Greenshot:
- These tools offer advanced features like editing, annotation, and easy sharing. Explore these options for a more versatile screenshot experience.
Section 4: Troubleshooting and Tips
Common Issues and Solutions:
- If your screenshots aren’t saving, check your destination folder or storage permissions.
- For poor image quality, adjust the resolution settings on your device.
Optimizing Screenshot Quality:
- Save screenshots in widely compatible formats like JPEG or PNG.
- Crop unnecessary elements to focus on the essential information.
Section 5: Frequently Asked Questions
Q1: Can I take screenshots of just one application window?
Yes, on Windows, use “Alt + PrtSc” to capture the active window only. On MacOS, press “Command + Shift + 4,” then press the “Spacebar” and click on the desired window.
Q2: Are there apps for capturing scrolling screenshots?
Yes, third-party apps like Snagit often provide the option to capture scrolling screenshots, useful for capturing entire web pages or documents.
Q3: How do I capture a screenshot on a Chromebook?
On most Chromebooks, press “Ctrl + Show Windows” to capture the entire screen or “Ctrl + Shift + Show Windows” for a selected area.
Conclusion: Mastering the Art of Screenshots
Congratulations! You’ve now acquired the knowledge and skills needed to confidently capture screenshots on your laptop. Whether you’re a Windows aficionado or a devoted Mac user, these methods cater to all preferences. Experiment with different techniques, explore third-party tools, and elevate your screenshot game to new heights. Happy capturing!
Check Out: Which Is The Best Lenovo Laptop
Also Read: How To Take Screenshot With Dell Laptop

